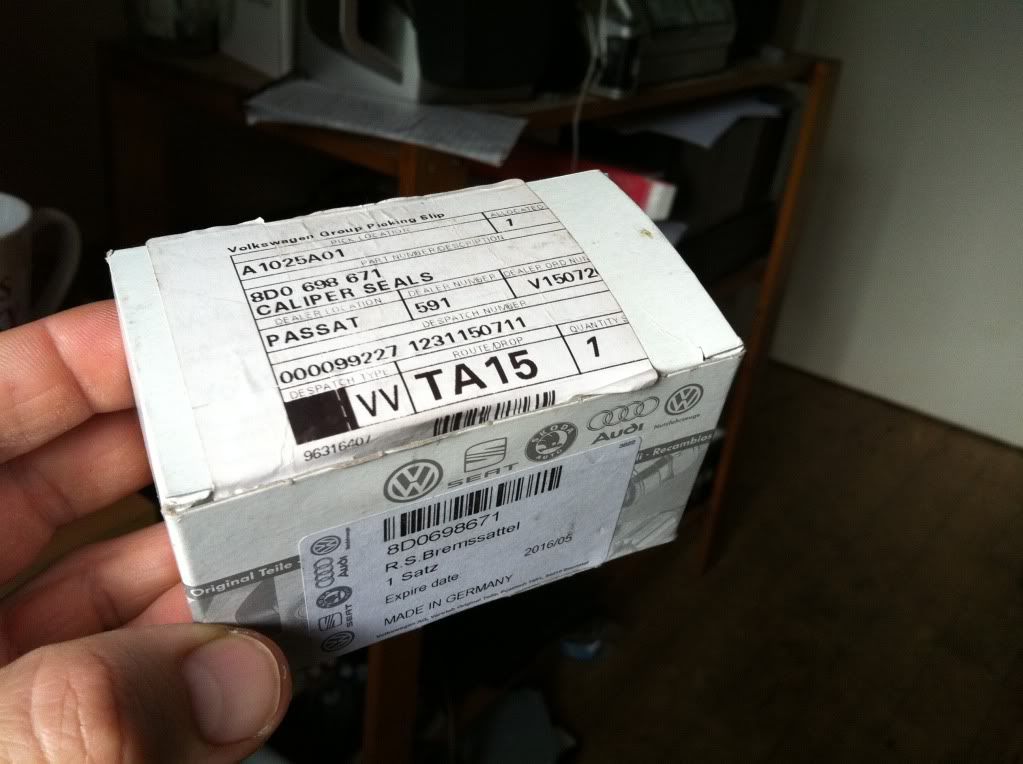
Tools needed are bricks/wedges, jack, axle stands, socket set, spanners, brake hose clamp, brake bleed kit, slotted screwdriver, water pump pliers, bucket to catch brake fluid, caliper rewind tool, rags/kitchen roll, coffee/tea and of course the caliper seal kit. Some are available on ebay and the net but VW also do them:
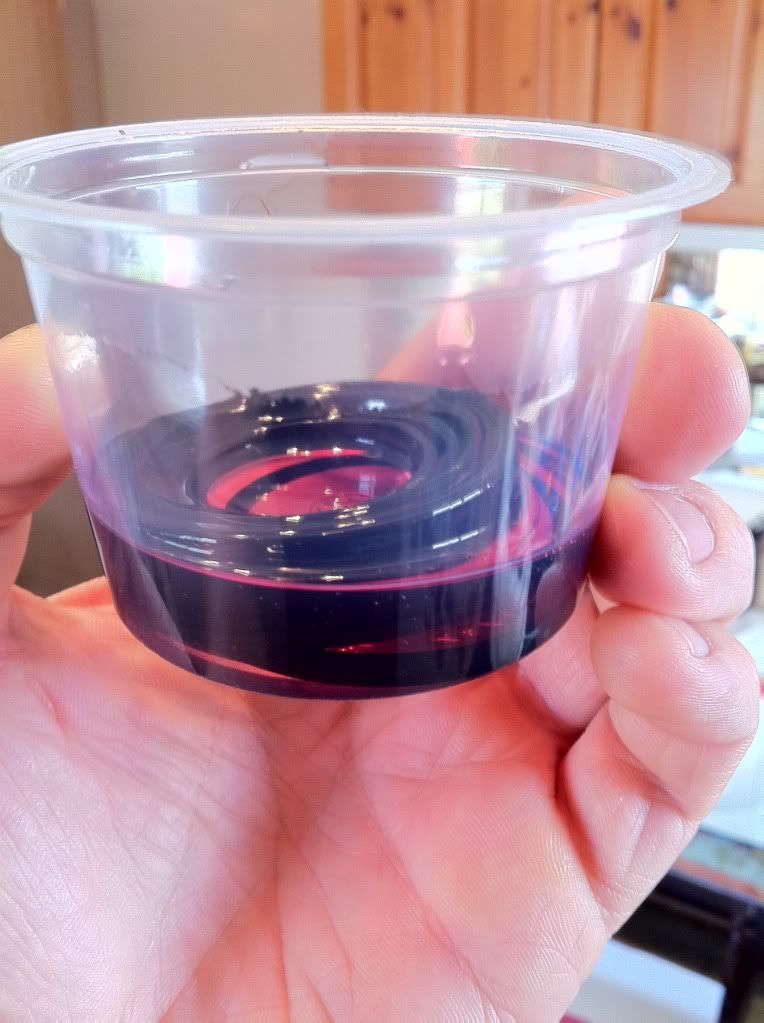
Inside this kit is 4 seals, one internal, one outer:
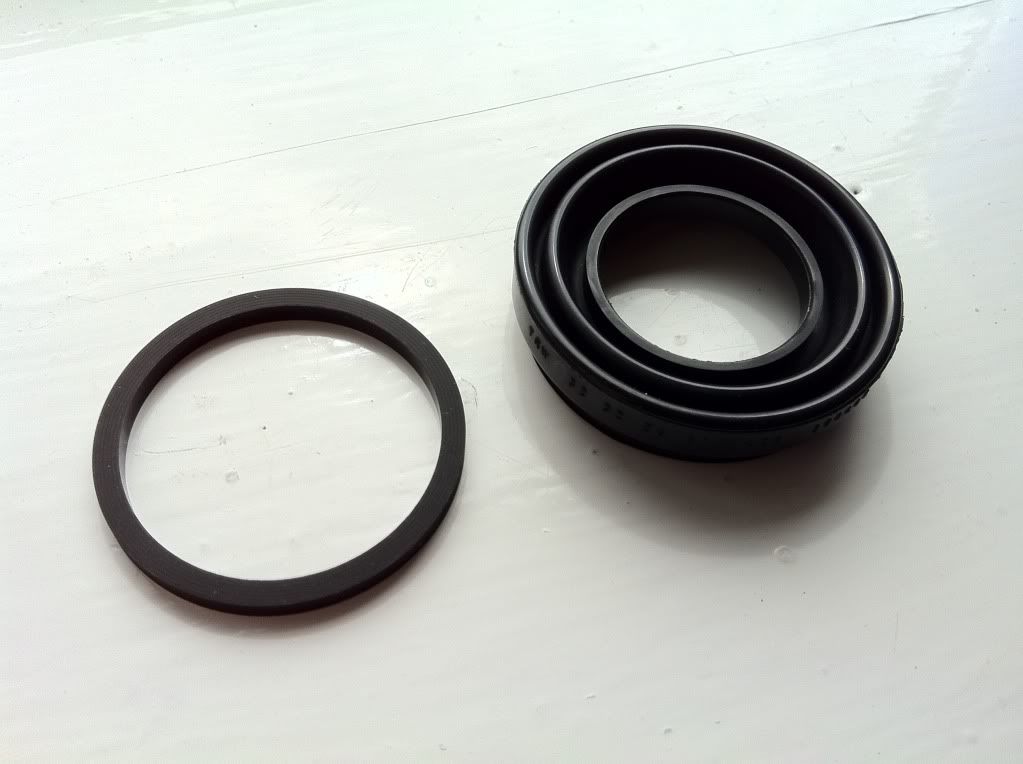
and some liquid that looks like raspberry sauce you get on a mr wippy ice cream, but please refrain from trying it.
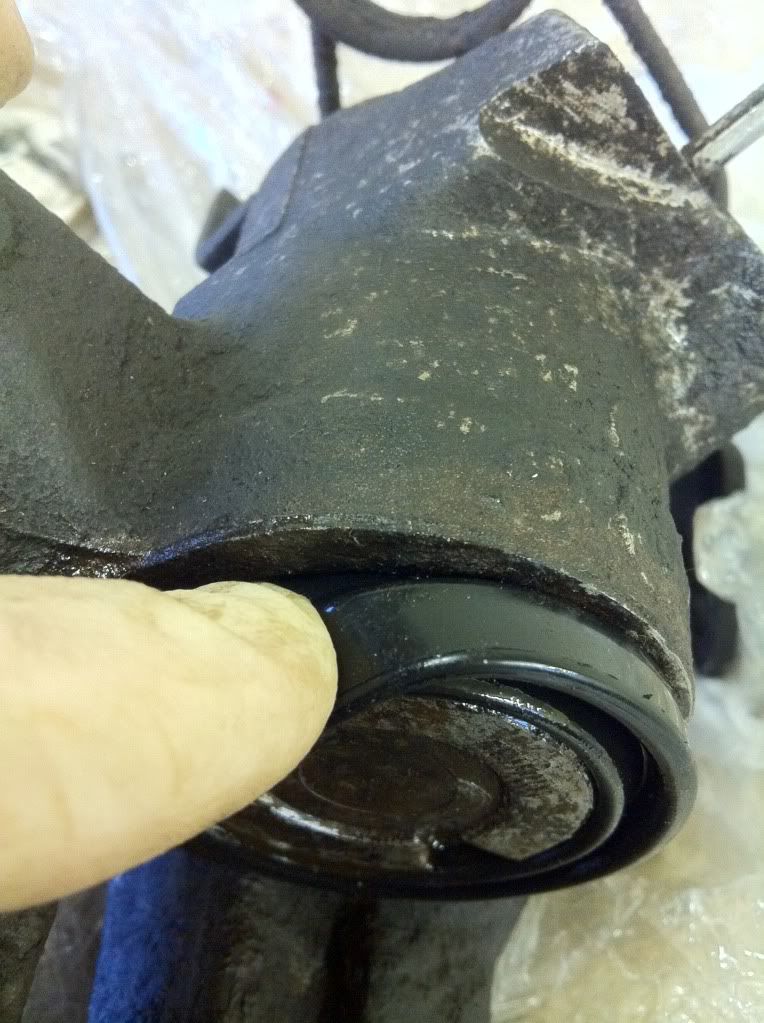
Ok so where do we start? First things first this is for the Lucas rear caliper that looks like this:

Although I'm sure this would be helpful on other types of rear calipers.
Ok, get the car on a level surface, brick the front wheels, jack up the rear and place on axle stands. Then remove the rear wheel. Don't forget to leave the car in gear or P if its an automatic, then release the handbrake.
Pop the bonnet, locate brake fluid reservoir, undo top and place a few layers of cling film across the reservoir opening then screw down top, this helps to limit brake fluid lose (so the Haynes manual says)
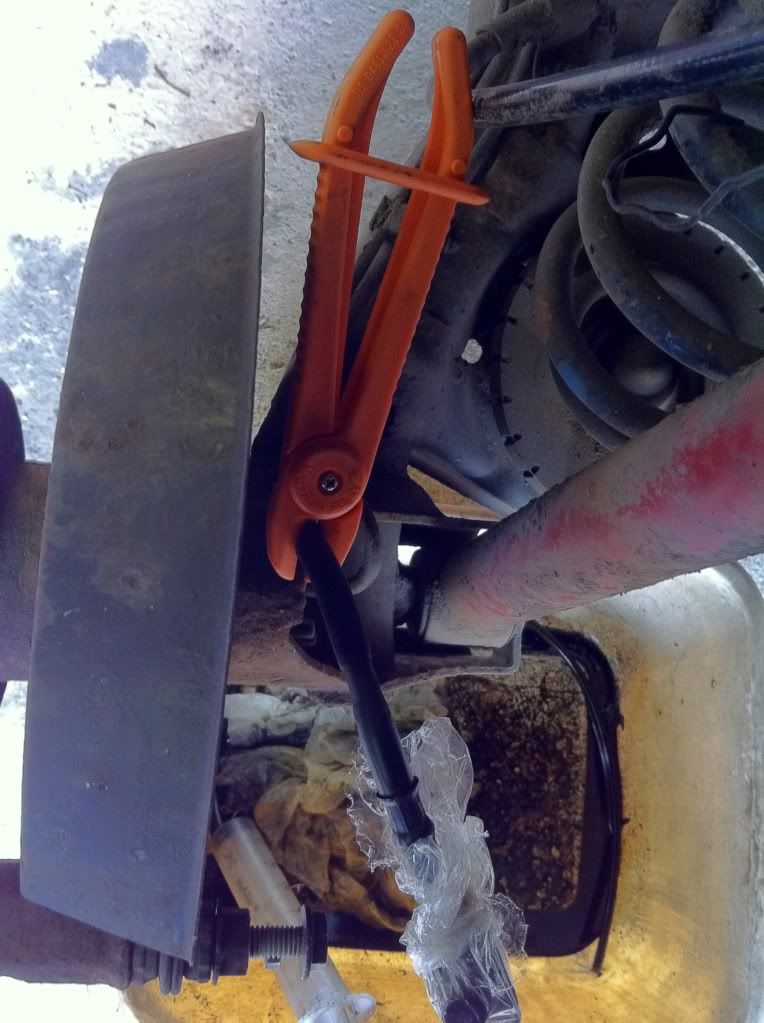
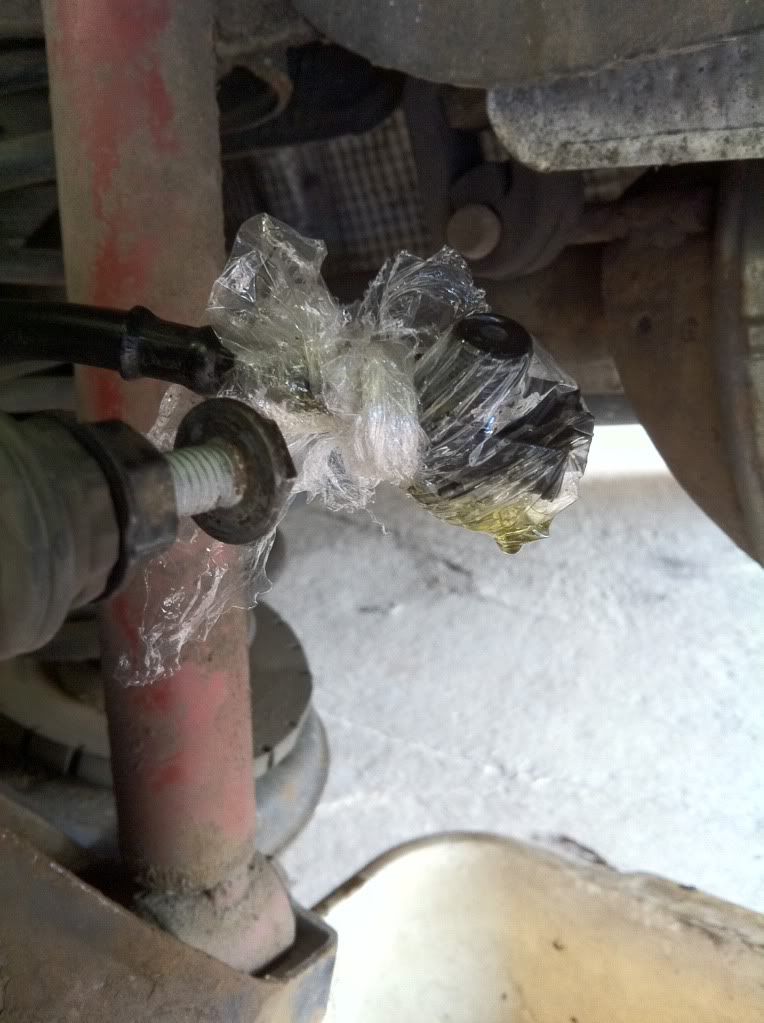
Nip around to the caliper and clamp the flexi brake fluid hose:
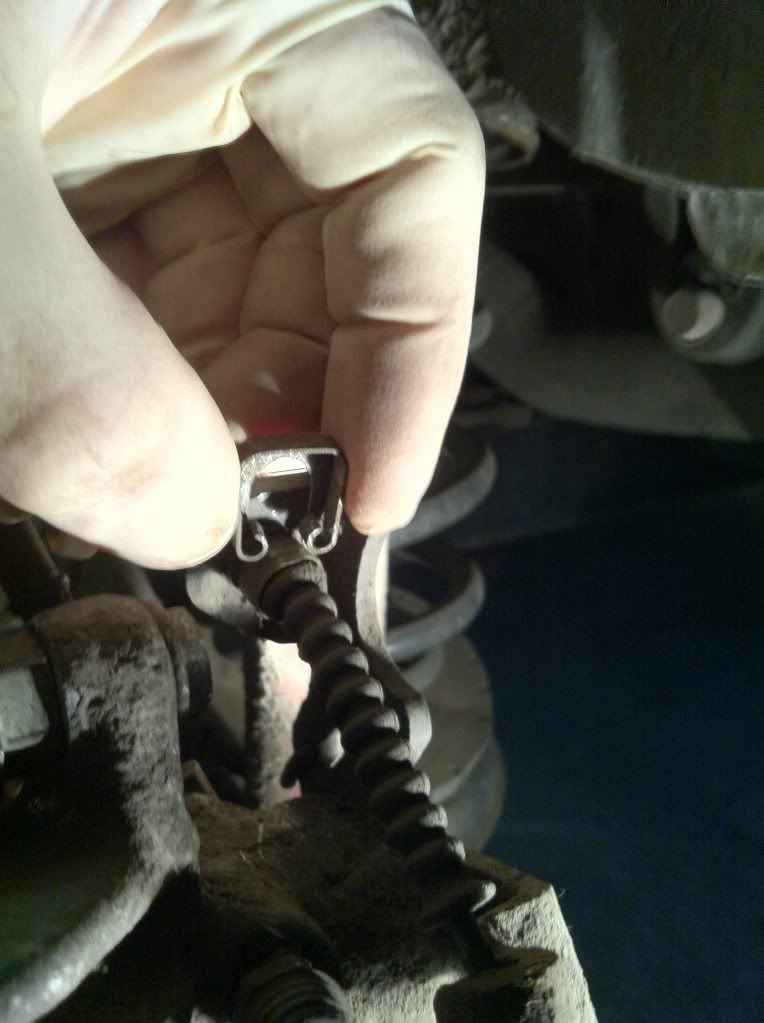
Next thing to do is to remove the handbrake cable from its mechanism. Remove the retaining clip:
Then remove ball joint bit from the caliper, this can be quite tough and the Haynes manual says to slacken off at the adjusters. I didn't and I removed it with a bit of gentle persausion (please see pic of caliper above for the removed ball joint of the handbrake cable.
Next is the brake fluid hose, find the securing bolt that holds it in and undo. Now although you have the hose clamped and cling film on the reservoir I found it still leaked a bit, a drop every min or so, so you will need to place a bucket underneath the caliper when you undo it, also grab some kitchen roll. I then got more cling film and wrapped it around the end:
Once the hose is out and the handbrake cable is freed all you need to do now is undo the two 13mm mount bolts at the back of the caliper whilst using a 15mm spanner on the slide pins so you can undo the 13mm bolts. It's obvious when your there.
After they are done you may need the slotted screwdriver to help you lever the caliper off from it's resting place.
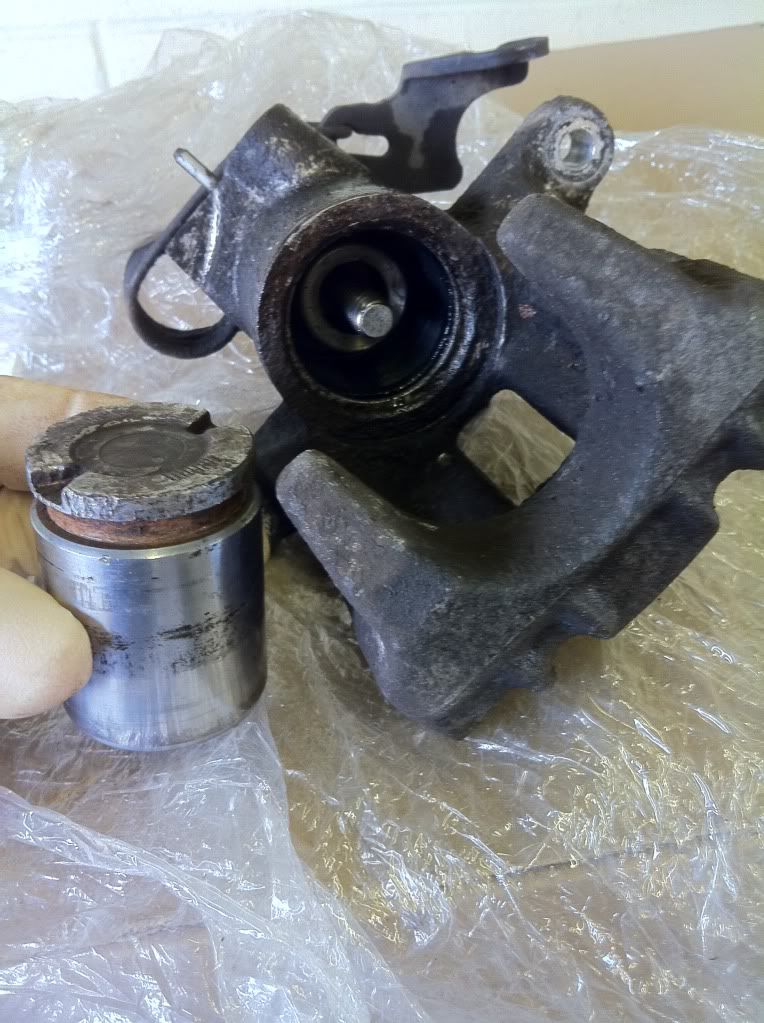
My caliper piston was seized solid thus made for an interesting few minutes. Hopfeully though yours may be just a bit sticky and should be a bit easier to remove. Empty the fluid from the caliper into the bucket and plug hole with some tissue or something similar.
If you have got this far well done, make yourself a coffee or tea and catch your breath, maybe have a smoke, ponder life or just think, why did I bother doing this?
Once done, grab the caliper and inspect the outer dust seals, laugh at them if there perished like mine were.
Place the caliper on a worktop or the like and pump the handbrake mechanism to eject the caliper as far as it will go. Mine was seized solid so I could not do this.
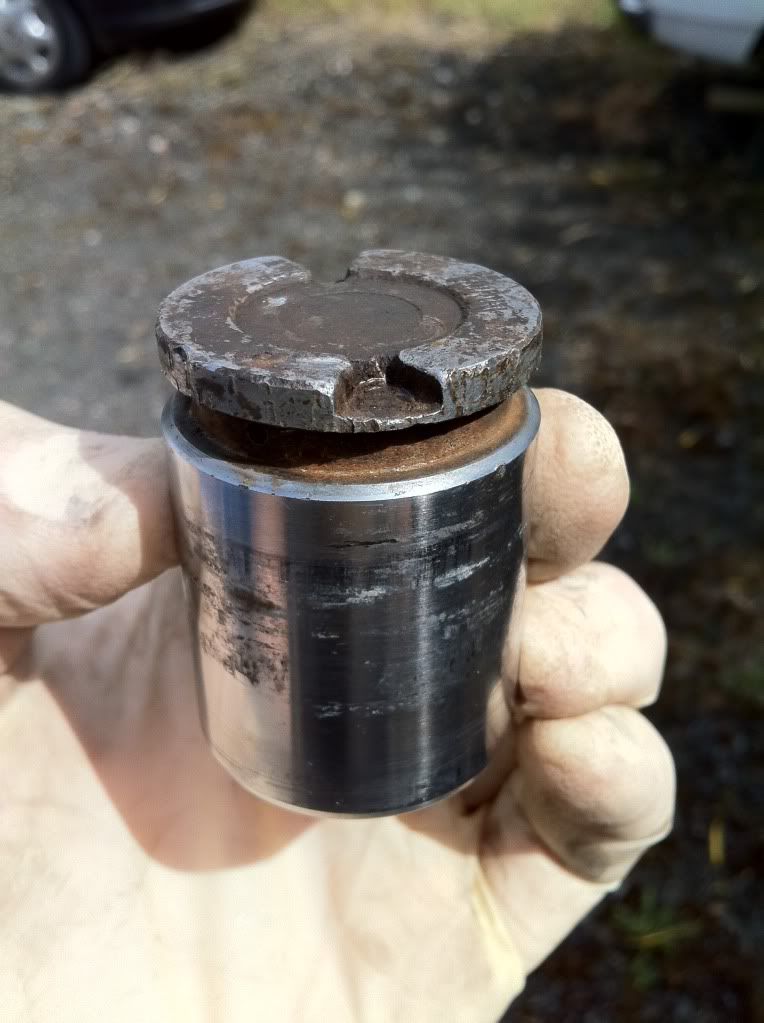
If yours is seized solid or you have pumped the piston so it will not go anymore then simple unscrew the piston in an anticlockwise direction. If yours is seized or a bit sticky then use the waterpump pliers to "gently" remove it. You should end up like this:
The outer dust seal on mine had vanished
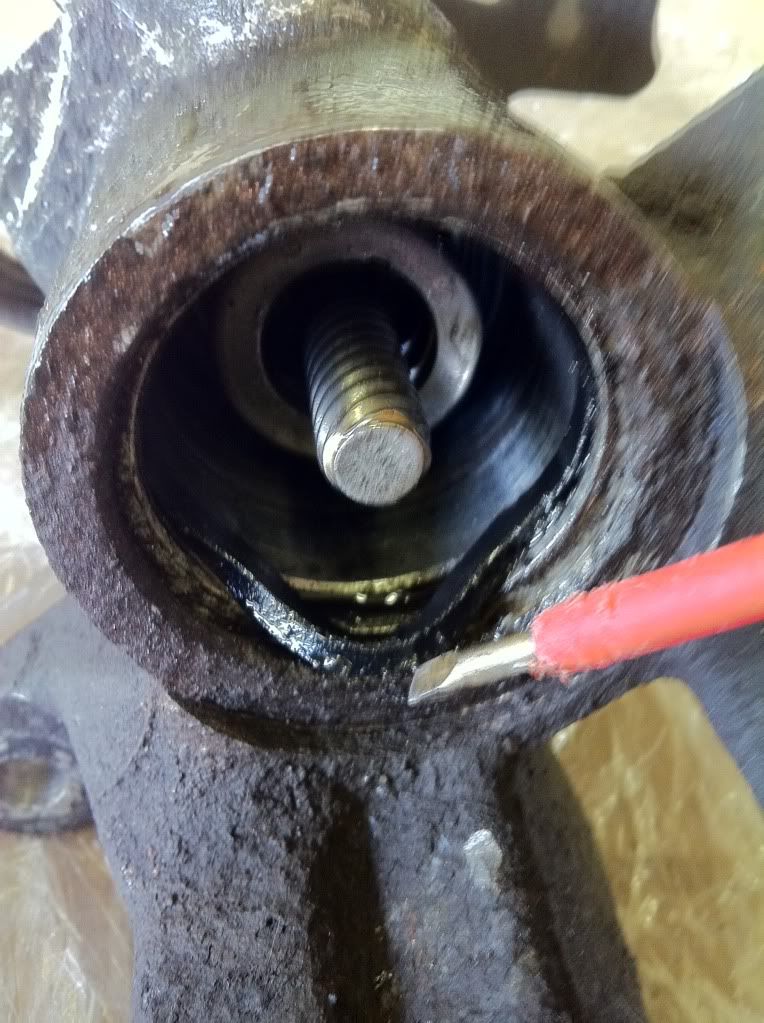
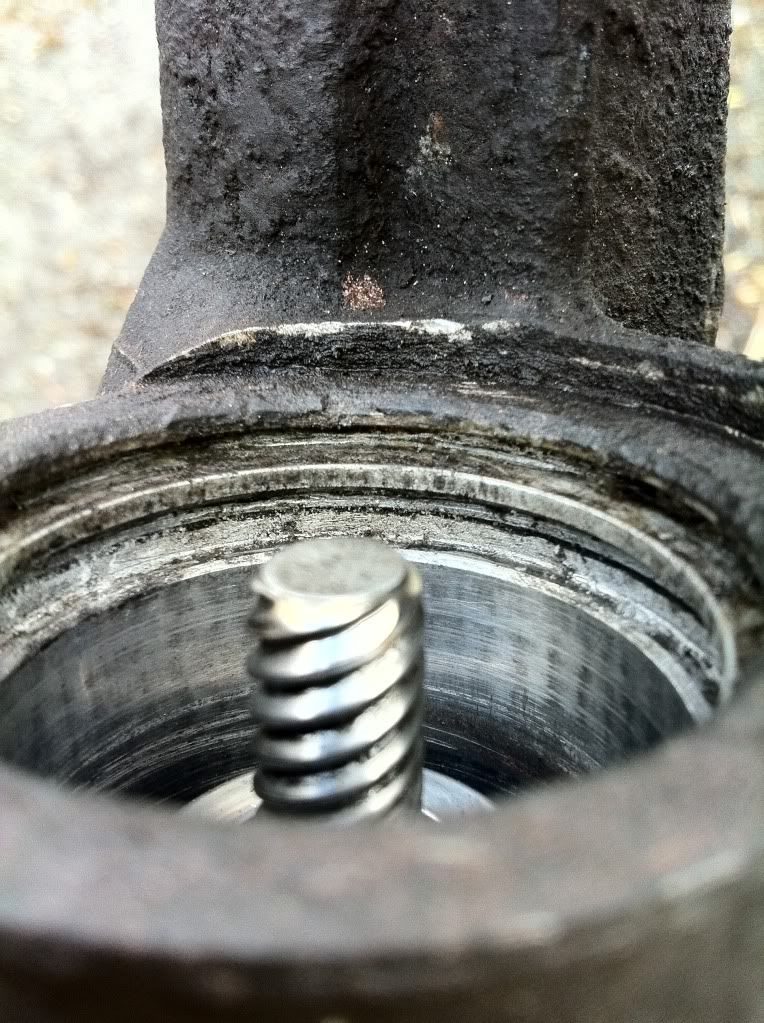
Put the piston to one side, and inspect the caliper. Look inside the piston housing:

Use your finger and a rag to clear all the dirt and crud that has got in there. Once that is done locate the the internal seal and use a slotted screwdriver to dig it out but be careful not to dig to hard:
Then remove seal completely:
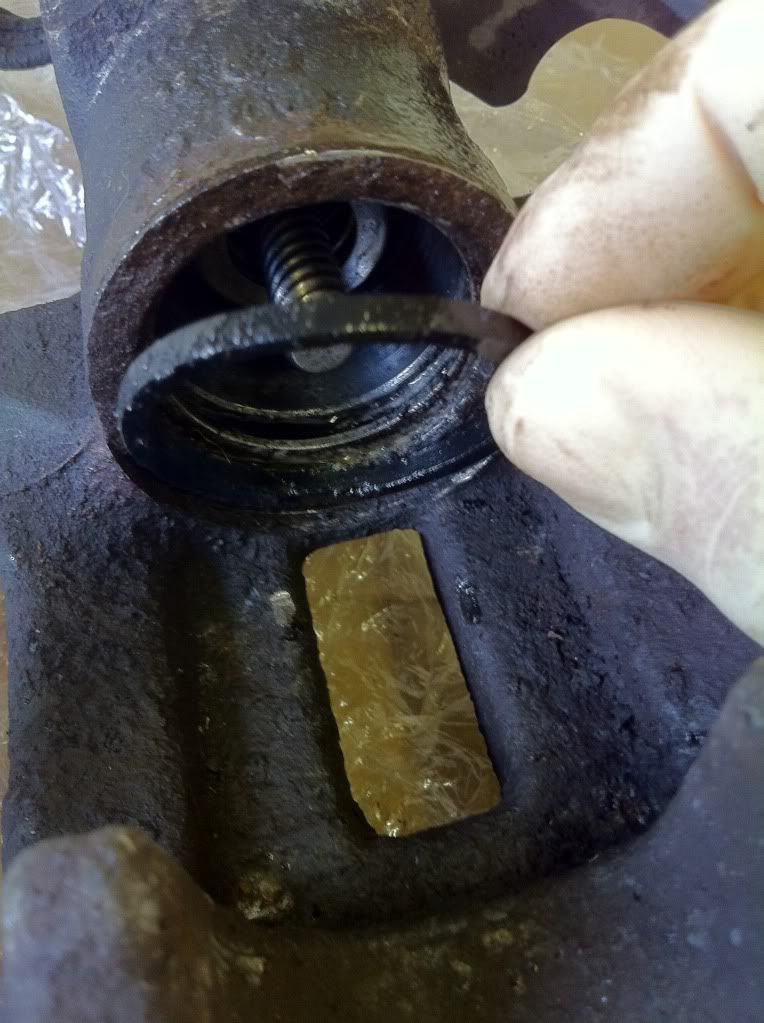
Now grab you special fluid that comes in your pack and submese he nw seal, inner and outer in it:
The instructions said to leave them soaking for 15 minutes. Use this time to clear anymore rubbish left or that had built up in the two grooves where the new seal will fit. I used a small terminal screwdriver to scrape out the crud that had got in.
It will make sense whilst you loo at it which are the two grooves to clean.
Next grab your piston and have a look:
The haynes manual says to renew the piston if it is badly rutted but as the whole job is about saving money and a new piston costs more than a 2nd hand caliper from the scrappys then i didnt see the point. I rubbed mine down with break cleaner and removed outtanding ruts with a stanley blade. There is a video on youtube that shows the piston being smoothed down on a rotary sanding machine but I'm not sure.
Ok, now grab those seals, shake off the excess fluid and wipe down with the kitchen roll. Seat the internal seal in its place. Now grab the piston and the outer seal, again wiping off the fluid with kitchen roll. Slip the seal over the piston and seat it in the groove at the top of the piston. Pull the seal down as far as you can and locate the piston on the caliper screw thread. It maybe a bit tight to get it past the internal seal but this is normal. Apply a little fresh brake fluid on the piston shaft. As we men know, a little lubrication always helps when inserting a shaft into a hole
Start screwing the piston in clockwise. You may get some resistance from the piston moving past that internal seal. You now need to make sure the outer seal rib sits into the top caliper groove. This can be a bit tricky. Screw the piston all the way in so it wont go no more:
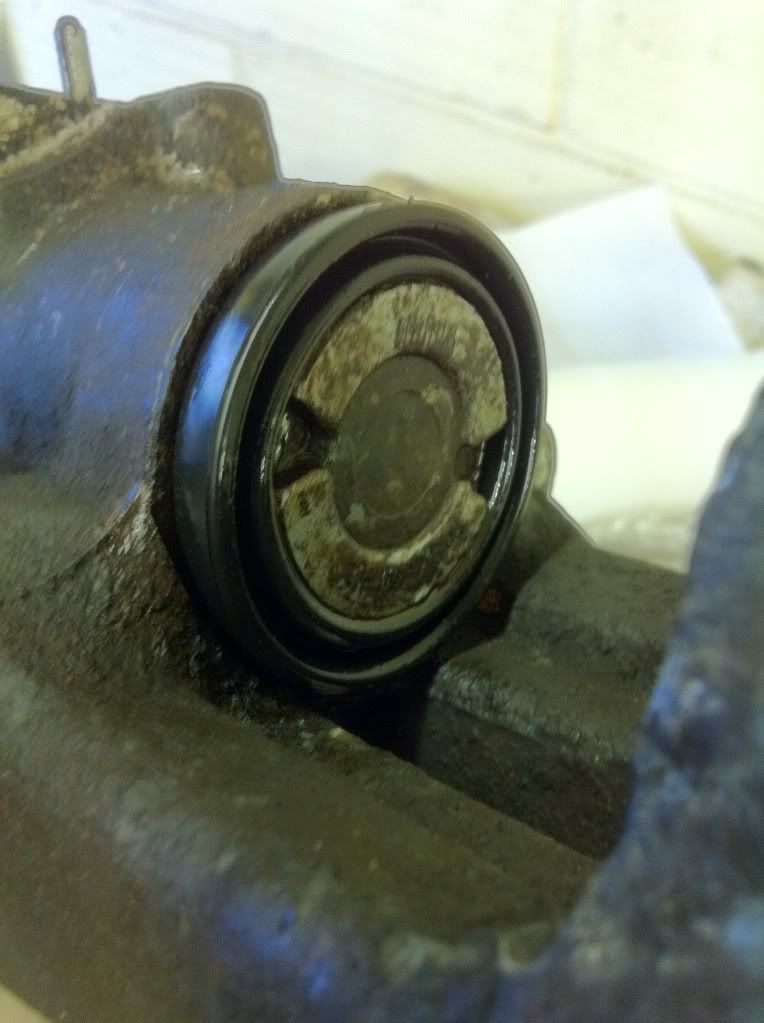
Then check that the rib has seated it self properly in the groove by running your finger all the way around the seal:
If it all looks ok then mount caliper back onto the mounting cage with the pads and disk in place. Remember the rear pads have anti rattle springs on the back so you will need a bit of grunt to hold the caliper in place whilst you do up the mounting bolts, just make sure they dont slip and poke out the inspection hatch.
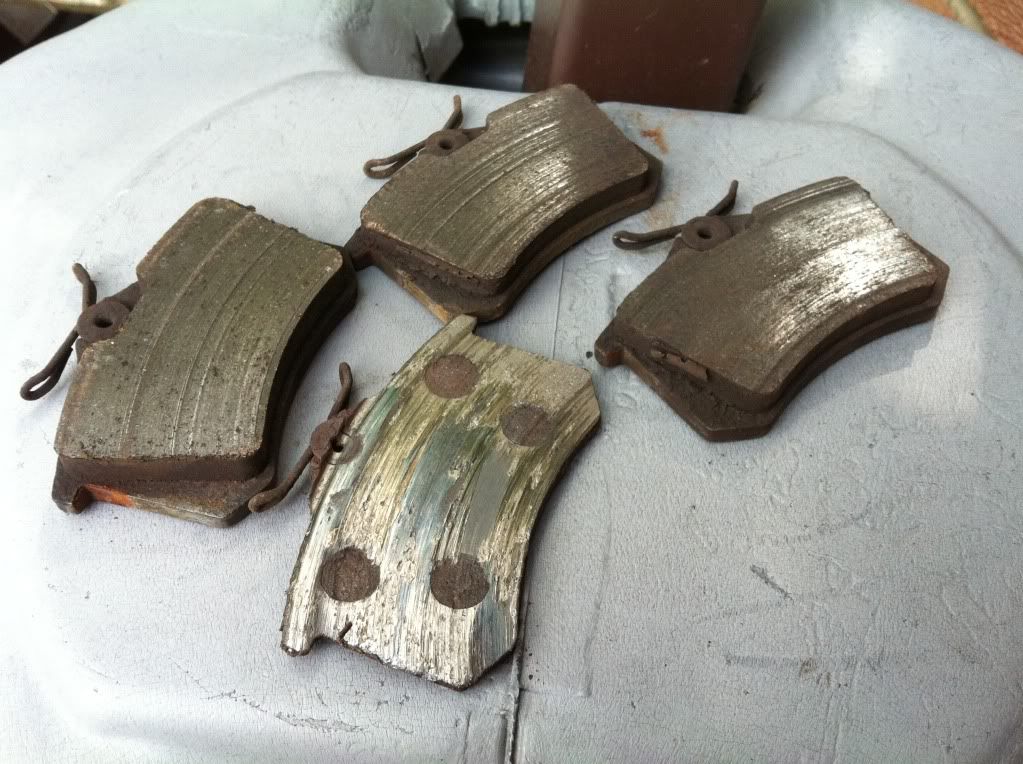
I renewed my brakes at this point due to my caliper being seized. This is what happened to the pads in the seized caliper as opposed to the other side. Can you guess which brake pad was sat against the seized piston:
Once all seated correctly attach the fluid hose. This can be tricky as there is a locating pin that needs, well, locating before doing the bolt head up. Again its obvious when you look at it.
Then attach the handbrake cable and securing plate as above.
Next remove hose clamp and bleed your rear caliper. I used a Gunson Eezibleed. Be careful though, if you car is old like mine W-reg then the reservoir is easily cracked due to it becoming brittle. only use 5-8psi max.
Once the caliper is bled, secured in place with brake hose and handbrake cable attached gently pump the handbrake to seat the pads against the disk. Apparently this is the correct way of doing as apposed to pumping the brake pedal.
Check for leaks around the fluid hose part.
Replace road wheel and lower to the ground, repeat otherside if needed.
Take out for a spin and listen for funny sounds etc whilst using the brakes.
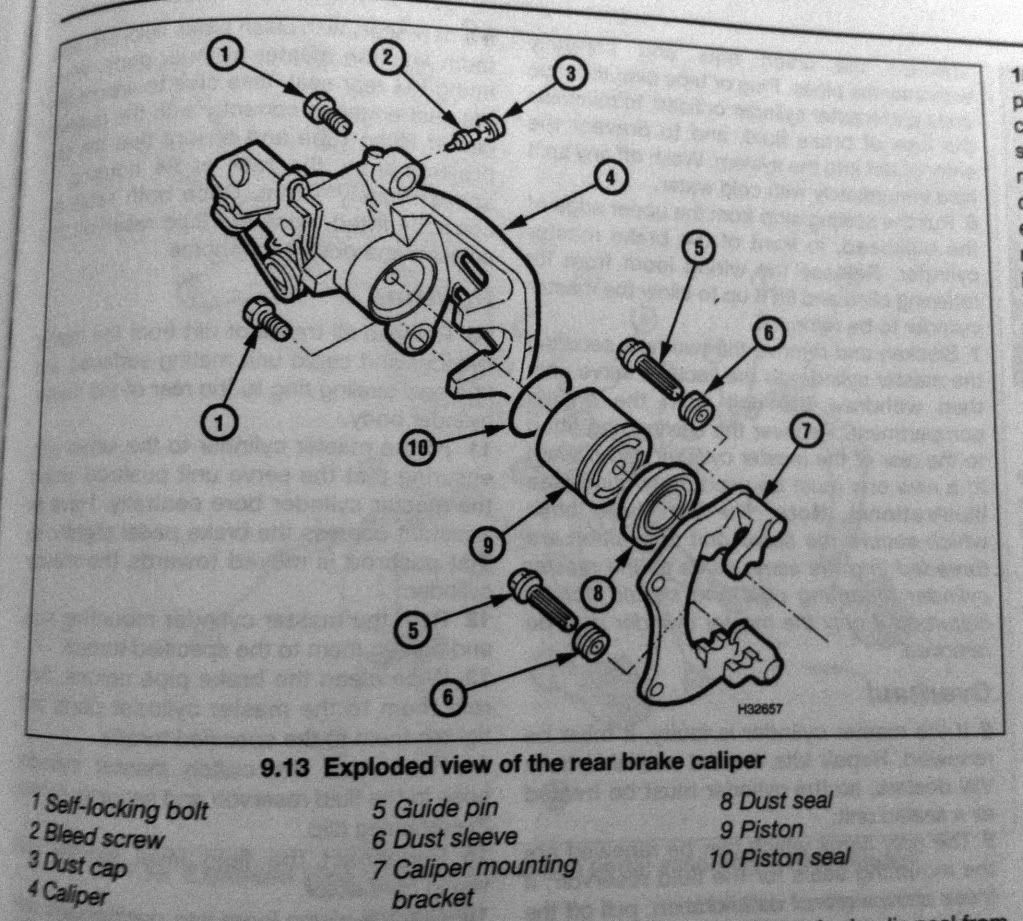
Here is an exploded diagram of the rear caliper for reference:
Now sit back and feel smug that you have saved some money instead of paying your mechanic to do it!